Did your AC lose cooling performance or airflow?
It could be due to a clogged evaporator coil.
Your AC’s evaporator coil is the device responsible for absorbing heat. If your coil gets clogged, your AC won’t cool your home.
In this article, I’ll explain everything that you should do if your AC’s evaporator coil is clogged. I’ll also go over the causes of a clogged evaporator coil so your AC won’t lose cooling again.
What to do when your AC’s evaporator coil is clogged
When your evaporator coil gets clogged up, you’ll need to remove the clog in order for your AC to cool your home again.
To unclog your AC’s evaporator coil, follow these steps:
- Gain access to the evaporator coil
- Remove the clog and clean the coil
- Check your AC system for air leaks
- Change your AC’s air filter
Gain access to the evaporator coil
If your AC’s evaporator coil is clogged, the first thing that you need to do is gain access to the evaporator coil. This can be an easy or difficult task depending on the installation of your evaporator coil.
Before working on your AC unit, turn the power off. This is a critical first step in ensuring that your AC is safe to work on.
Some evaporator coils are installed behind a layer of sheet metal—it will be difficult to access the coil unless the installer also installed an access door for the coil. If that’s the case you need to remove the sheet metal that covers the evaporator coil.
If your unit came with a factory-installed evaporator coil, then the coil is usually installed behind an access panel. In this situation, getting to the coil is much easier—just remove the access panel to get to the coil.
After gaining access to the coil, you need to get to the intake side of the coil.
If you have an A-coil, you need to remove the piece of sheet metal that’s covering the center area of the coil. Behind the sheet metal cover is the intake side of the coil. The intake side of the coil is almost always the dirtier side of the coil and the side that you’ll be cleaning.
One thing that I should mention is that a clogged coil will sometimes get frozen up. If you find that your evaporator coil has turned into a block of ice, you need to let it defrost before cleaning it.
For more information about frozen evaporator coils, check out my article below:
Remove the clog and clean the coil
Now it’s finally time to clean out the clogged evaporator coil!
If your coil has caked-on dust, then you should first try to remove as much as you can by hand. That way your cleaning solution will penetrate deeper into the coil.
Next, spray an evaporator coil cleaning solution on the dirty side of the coil. I prefer using a spray cleaning solution that foams up. The foaming action pushes out debris from the inside of the coil, unclogging the coil in the process.
Be sure to get good spray coverage on your coil—don’t skip over any areas.
I recommend spraying the cleaning solution starting on the bottom of the coil, then working your way up toward the top of the coil. The foam tends to drip down, so you’ll be able to see where you still need to spray if you start at the bottom.
After spraying your entire coil, allow the solution to sit for 5-10 minutes. This gives the cleaner time to foam up and dislodge dirt and debris from the inside of the coil. You’ll see the foaming action push dirt and grime out from the coil.
If your coil is severely clogged, It might be necessary to scrub the coil with a nylon brush. There are purpose-made brushes for cleaning AC coils, but you can also use a toilet brush (Just don’t use the same one that you use for your toilet).
The next step is to rinse out the coil. Some cleaning solutions say that you don’t need to rinse, but I always recommend rinsing your coil out to ensure that it gets as clean as possible. You’ll also be able to see the results of your work.
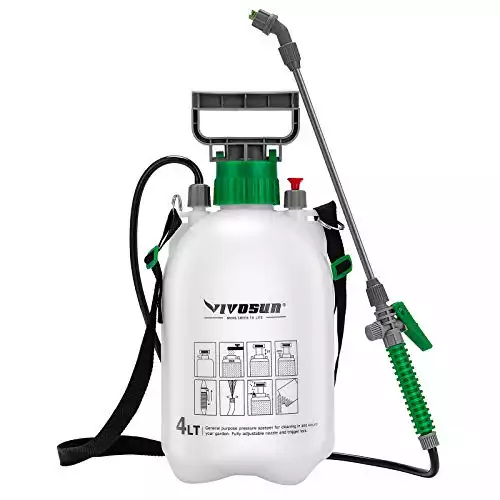
Use a low-pressure sprayer to rinse out your coil with water. The pump sprayers that are used for lawn care are perfect for this task.
This pump sprayer has an angled tip—perfect for spraying into tight areas in your evaporator coil.
Whatever you do, don’t use a high-pressure spray such as a pressure washer. Using a high-pressure spray will damage the fins on the coil.
When rinsing out your coil, be sure that the drip pan underneath your coil doesn’t overflow with water. It’s sometimes necessary to set up a drop cloth under your unit to catch splashes of water.
After the coil is cleaned out, clean out the grime from the drip pan using a wet/dry vacuum and a rag.
When you’re done cleaning out the clogged coil, put the cover back on and start up your AC unit!
Check your AC system for air leaks
Now that you’ve unclogged your evaporator coil, the next steps are to address why the coil was clogged in the first place.
One of the most common causes of an evaporator coil clog is an air leak in your AC system.
If your AC has an air leak after its air filter, dust and other particles will infiltrate your system and get stuck in your evaporator coil.
If your AC system has an air filter at its return vent instead of in the unit, then an air leak anywhere in the return duct will allow dust to get into your AC’s air handler and clog up the evaporator coil.
So how do you find air leaks?
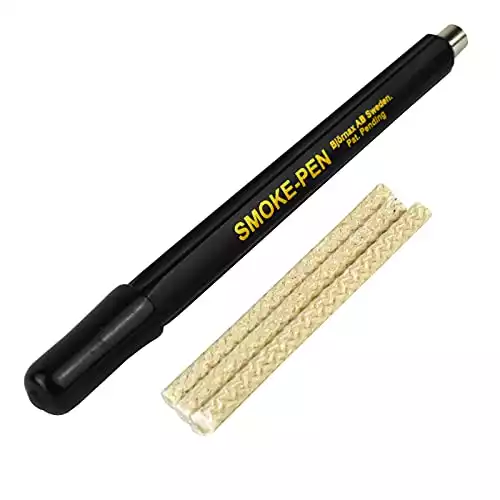
The tool that I use to find air leaks is the smoke pen.
Light up the wick on the smoke pen and blow out the flame. The wick will produce a stream of white smoke.
Move the pen around your unit and return ductwork. If you see the stream of smoke start flowing into your unit or duct, then there you’ve found an air leak!
This smoke pen produces a stream of white smoke that you can use to trace out air leaks in your HVAC unit.
It comes with 3 smoke sticks—more than enough to find all your leaks.
The best places to look for leaks are in the seams and panel edges of your air handler unit and ductwork—that’s where most air leaks spring up.
If you find an air leak, then you can fix it yourself. Most air leaks are small enough to be covered up by some foil tape.
For larger leaks, you’ll need to cover it up with some mastic and mesh tape.
Check out my article about sealing your ducts here:
Change your AC’s air filter
A dirty air filter can also cause a clogged evaporator coil.
An excessively dirty air filter has the tendency to deform, allowing dust and particles to bypass the air filter and stick to the evaporator coil.
In the worst case, your air filter will collapse if it gets clogged up with too much dust.
An air filter can also collapse if it is installed the wrong way.
Even if your air filter is slightly bent around the edges it can cause small air leakages, allowing dust to bypass the filter.
That’s why it’s important to change your air filter regularly.
I recommend changing your AC’s air filter every 1-2 months, depending on the usage of your AC system and the cleanliness of your home.
For example, if you have pets or children in your home it might be necessary to change your AC’s air filter more often.


