Did you know that leaky ducts in your home can reduce heating and cooling efficiency by as much as 20%?
That reduction in efficiency is just enough to give you high utility bills and an uncomfortable home climate.
Worse yet, leaky ducts can also cause humidity and mold issues.
The good news is that there are a couple of different ways to reduce air leaks in your home’s HVAC system.
In this article, we’ll go over how to seal the ducts in your home. We’ll also compare aluminum tape versus mastic– and what situations to use them in.
Why you should seal your ducts
Leaky ductwork is one of the most overlooked factors when it comes to HVAC systems in homes. In an average home, about 20-30% of air that moves through a duct system is lost due to leaks, holes, and poor installation.
The worst part about leaky ductwork is that in most cases, it is barely noticeable.
In most home HVAC systems, there is not a big leak in any one place. Rather, there are lots of tiny leaks all around the entire system.
A considerable portion of airflow is lost due to numerous tiny leaks.
All of those small leaks add up into efficiency losses, which costs you money in the long run!
Aluminum tape for duct sealing
Between aluminum foil tape and mastic, foil tape is much easier to use. You simply just remove it from the backing and tape it onto your ductwork.
Here are the advantages of using aluminum foil tape to seal your ducts:
- Good for sealing long seams. Aluminum foil tape really shines when you need to cover up long seams or connections between ducts. You’ll have those seams sealed in no time at all.
- Easy to patch holes. Foil tape is also great for patching small holes in your ductwork. Just peel it off and stick it over the hole.
However, there are a few downsides to using aluminum foil tape to seal your ductwork:
- Dirty ductwork won’t allow for good adhesion of the tape onto the ductwork’s surface.
- Before applying aluminum foil tape, you need to ensure that your ductwork is clean and free of dust or grime.
Mastic for duct sealing
Using mastic to seal your ductwork is a much messier job. However, mastic has a few advantages over foil tape:
- Mastic lasts longer. If applied properly, mastic is a permanent solution for sealing ducts.
- Easier to apply in hard-to-reach areas. Believe it or not, mastic can be easier to apply in areas that you can’t see– since all you need to do is smear it on.
- Best for sealing sharp edges and corners. Sharp edges on ductwork have the potential to slice aluminum tape in half. Mastic can be applied right over sharp surfaces and won’t have any issues.
There are also some disadvantages to using mastic to seal your ductwork:
- The main disadvantage of using mastic is its mess. Mastic is a gooey, paint-like substance that is easy to get on your clothes if you’re not careful.
- Using mastic to seal your ducts is a much longer process. There are a few extra steps you need to take to apply mastic on your ducts.
How to seal the ducts in your home
Sealing the ductwork in your home is one of the simplest things that you can do. Relatively speaking, it is much easier than other home HVAC projects.
The best thing is that it offers an immediate payback in energy efficiency– saving you money very quickly.
There are two different ways to seal your ductwork:
- Aluminum foil tape
- Mastic
We’ll go over each of them below.
How to seal ductwork using aluminum foil tape
Aluminum foil tape is best for quickly sealing your ductwork.
Using aluminum foil tape doesn’t take much effort, the main thing you need to do is make sure your ductwork is clean beforehand.
Here are the steps to use aluminum tape below:
1. Clean the ductwork
The first thing that you need to do is clean the ductwork.
Remove dust off the area that you want to seal. This ensures that the foil tape will stick to the ductwork.
Remove any kind of oily substances present on the surface where you want to apply foil tape. Use a rag to wipe off grime, and clean the surface using rubbing alcohol to ensure it is completely free of oils.
2. Prepare foil tape
After the ductwork is clean, start preparing your foil tape for application.
Measure out the length of foil tape that you will need, and cut it to length before removing it from its backing.
Make sure that you’ll be able to get the tape all the way around the duct that you want to seal. Sometimes, it may be troublesome to apply foil tape around a corner.
It’s also tough to apply foil tape behind a duct where you can’t see, so make sure your route is planned out before you actually apply the tape.
3. Apply foil tape
The next thing to do is to apply aluminum foil tape to the ductwork. This gives your ductwork an initial seal.
When applying foil tape, it’s important to make sure the tape adheres to the ductwork.
Press down on both sides of the tape to make it stick. You want to create a good seal without any air bubbles in the foil tape.
If the foil tape doesn’t stick, then the duct’s surface may need to be cleaned a bit more.
How to seal ductwork using mastic
Using mastic to seal your ductwork is best if you have irregular gaps or tight areas to seal.
Mastic also works well over areas with screws, where it would be hard for aluminum tape to stick properly.
Here are the steps to use mastic to seal your ductwork:
1. Gather materials
There are a few things that you need to apply mastic to ductwork:
- Tub of mastic duct sealant
- Chip brush
- Rag
- Old set of clothes (that you don’t mind ruining)
- Mesh tape (optional)
Most hardware stores sell mastic. However, it is a good idea to get mastic that is fiber-reinforced. Fiber-reinforced mastic can stand up to some abuse, and generally lasts much longer.
Chip brushes are those cheap brushes that look like paint brushes.
The difference is that chip brushes have large bristles that aren’t affected by certain chemicals and solvents. So a chip brush works best for applying thick, sticky mastic.
You’ll also need a rag for two purposes: to clean the ducts, and to wipe away excess mastic.
Also, remember to wear your old junk clothes. Like paint, mastic tends to get all over the place. You don’t want to ruin your nice pair of pants.
If you have a large gap that you need to cover, using a layer of mesh tape will help with that. Using mesh tape will reinforce the mastic, forming a strong bond that lasts a long time.
2. Clean the ductwork
Having clean ductwork ensures that your mastic will stick.
Similar to aluminum tape, remember to clean your ductwork of any dust or grime before applying mastic.
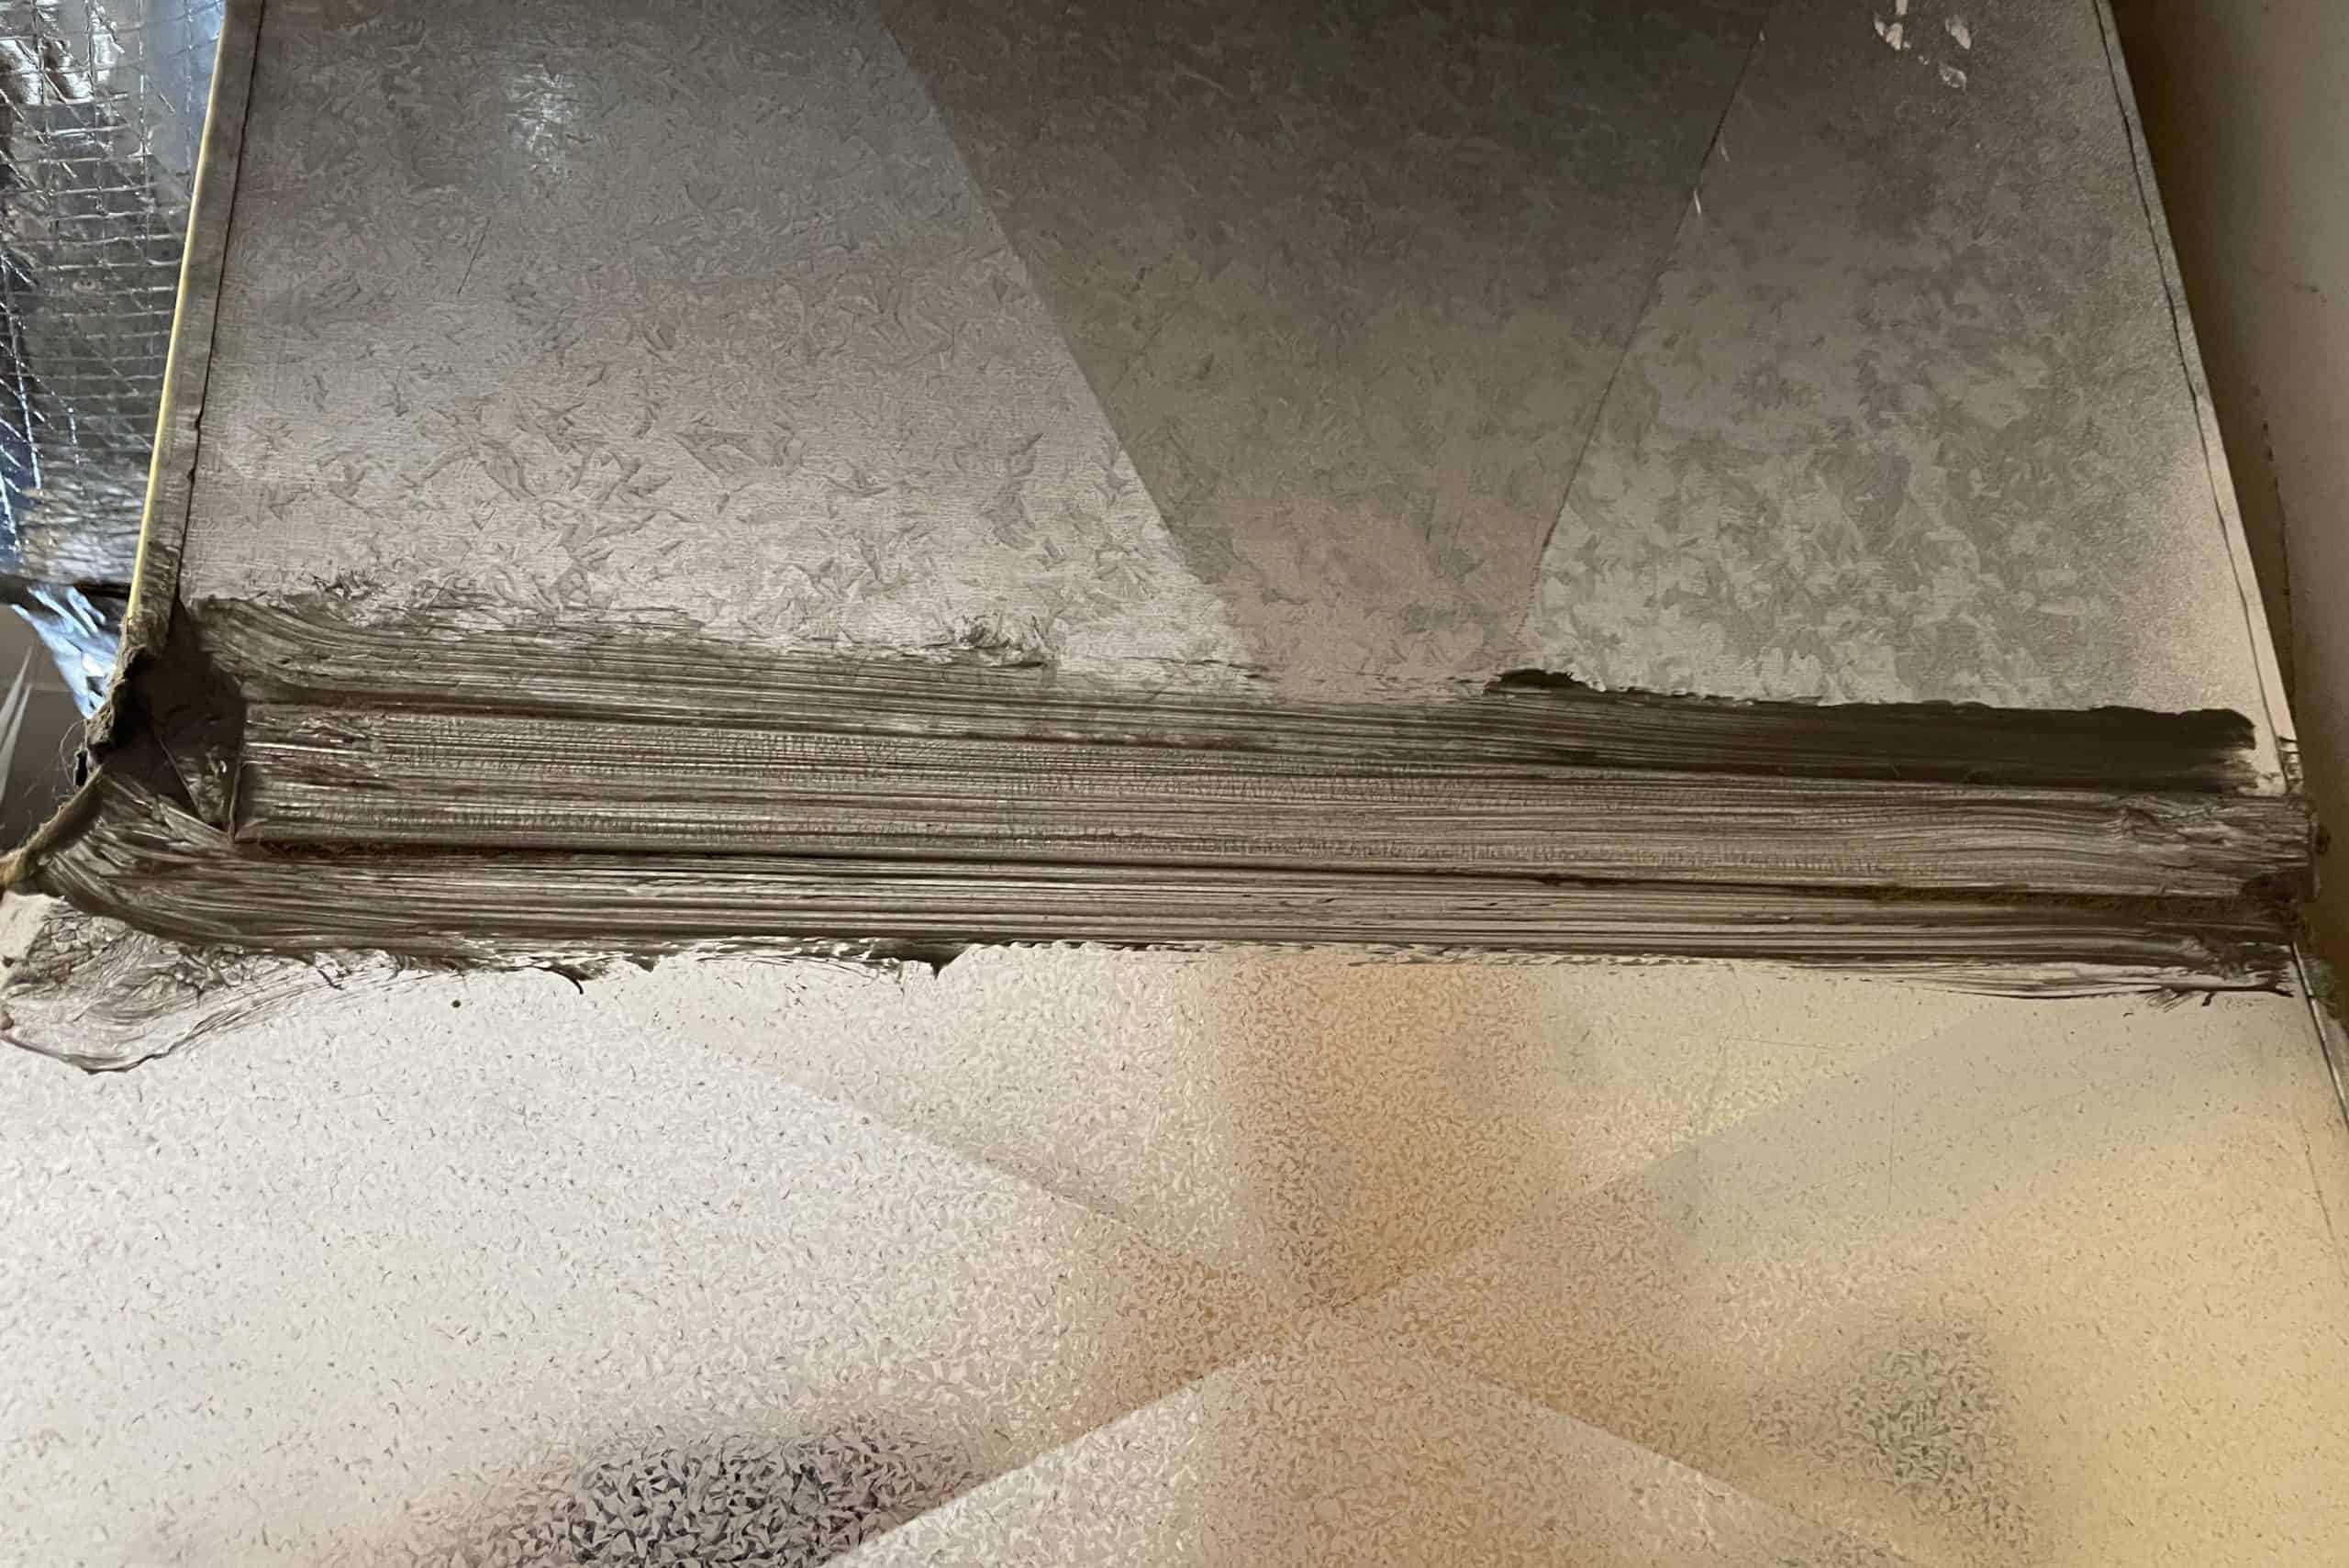
3. Apply mastic
The final step is to brush on the mastic sealant. Use your chip brush to apply a few layers of mastic to the gaps and joints in your ductwork.
Don’t be shy– you can never put on too many layers of mastic.
If you have a large gap that you need to cover up, all you need to do is put down a layer of mesh tape before you apply mastic.
The mesh tape makes the mastic much stronger and more resistant to stress. The result is a strong, reinforced layer of duct sealant.
Are you following air conditioner airflow blog series?
Airflow issues are common among central air conditioners. Even though they are simple in nature, airflow issues can cause HUGE problems down the line. I’ve written a few blogs answering questions that people have about air conditioner airflow. You can check them out by clicking the links below.


GOOD INFO AGAIN. I WISH YOU WOULD HAVE PICTURES WITH YOUR EXPLANATIONS.